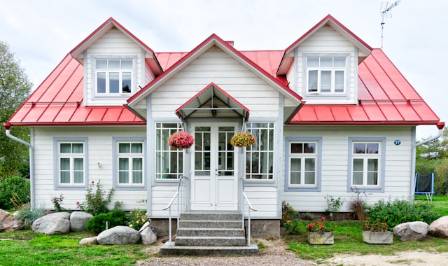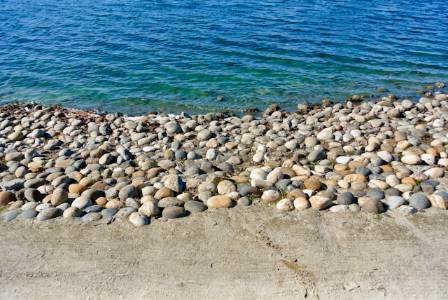
As a child, some of my fondest memories were searching for agates on the beaches of the Oregon Coast. My focus was always on finding the specific types of stones we knew could become smooth and shiny, like agates and jasper. Today, I continue this tradition with my own daughters, aged 7 and 11. Together, we scout the same shores for these durable stones to take home and polish in our rock tumbler. It has become a cherished family ritual.
We have perfected our rock tumbling technique, and the children are always excited for the next batch. It’s a fantastic activity for the whole family, offering a hands-on science lesson right at home.
Which Rocks are Best for Polishing?
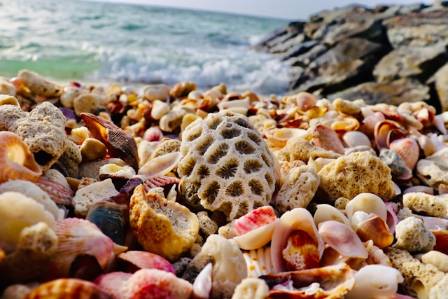
While exploring the beach, your best finds will be agates and jasper. The majority of beach stones are not suitable for tumbling, which is what makes the hunt so engaging—discovering the right specimens is a rewarding challenge. Generally, the most successful results come from harder types of rock.
Where Should You Operate the Tumbler?
The constant hum of a rock tumbler can be soothing to some, but potentially bothersome to others. It's important to place your tumbler in a location away from sleeping areas, as it will need to operate continuously for a month or longer. An ideal spot is a garage, shed, or workshop.
The Rock Tumbling Process
Step 1: Coarse Grind (Shaping) | 7-10 days
The first step is to load your tumbling barrel.
a. Fill the barrel about two-thirds full with your collected stones, using a mix of sizes for the best tumbling action. Gently shake the barrel to settle the contents. Remember, the stones will become about 15-20% smaller during this process. An improperly filled barrel will prevent the rocks from tumbling effectively.
b. Add the recommended amount of coarse grit, consulting the tumbling compound chart for the correct quantity based on your barrel size.
c. Add water until the level just reaches the bottom of the top layer of stones. Be careful, as too much water will hinder the tumbling process; the machine requires a precise balance to work correctly.
Step 2: Medium Grind (Sanding) | 7-10 days
After the first stage, it's time to move on to the medium grind.
a. Thoroughly clean all the coarse grit from the rocks and the barrel. This step is critical—every single particle of the previous grit must be removed.
b. Repeat the instructions from Step 1, parts a through c, but this time use the medium grit instead of the coarse grit.
Step 3: Fine Grind (Pre-Polish) | 7-10 days
Next is the pre-polish stage.
a. Meticulously wash all the medium grit from the rocks and the barrel.
b. Again, follow the instructions from Step 1, a-c, substituting the fine grit for the coarse grit.
After this one-week cycle, your stones should feel very smooth and have a noticeable sheen.
Step 4: Polish | 5-7 days
The fourth step is the polishing stage, which brings out the shine in your beautiful stones.
a. Completely clean the fine grit from the rocks and the barrel.
b. Follow the loading instructions from Step 1 once more, now using the polishing compound in place of the grit.
Seal the barrel and let it run for another five to seven days.
Step 5: Burnish with Soap | 4-5 days
Sometimes, stones can appear slightly hazy after polishing because tiny particles remain trapped in their microscopic crevices. A burnishing cycle with soap cleans them and enhances their shine. We have always used Ivory Snow laundry detergent, but other powdered soaps like Tide or White King also work well. Do not use liquid detergents for this step.
a. Give the rocks a final, thorough rinse to remove all polishing compound.
b. Load the barrel as described in Step 1, but use the recommended amount of powdered soap (refer to the chart, as it is typically less than the grit amount). This cycle only needs to run for four to five days.

Helpful Tips for Success
Patience is key. Excellent results cannot be rushed.
Never pour the gritty slurry down your sink drain, as it can harden and cause a serious blockage.
Avoid tumbling rocks of different hardness together. For instance, do not mix quartz and agate in the same batch.
Cleaning is critical. To prevent a hazy finish, ensure the rocks and barrel are perfectly clean between each stage. Grit trapped in natural pits on a stone's surface can ruin the polish; either clean these pits meticulously or remove such stones from the batch.
Once your stones are gleaming, the possibilities are endless. You can display your polished treasures, craft them into jewelry, or give them away as "wishing stones." You will undoubtedly find a special use for the beautiful gems you created.